Lore:Nerevarine
| Hortator Nerevarine | |||
|---|---|---|---|
| Race | Unknown[nb 1] | Gender | Unknown[nb 1] |
| Born | Third Era |
||
| Resided in | Vvardenfell Solstheim |
||
| Appears in | Morrowind | ||
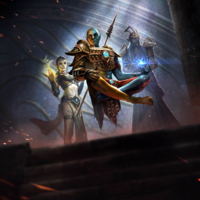
The Nerevarine, the prophesied Incarnate, is the alleged[1][nb 2] reincarnation of Chimeri warlord Indoril Nerevar. The Nerevarine arrived in Morrowind in 3E 427 by the order of Emperor Uriel Septim VII, having been sent to Vvardenfell as a prisoner of the Empire. Their arrival was directly linked to a prophecy which dictated that Lord Indoril Nerevar would be reincarnated and return to Morrowind to defeat Dagoth Ur and restore the glory of Resdayn. The hero fulfilled the prophecy, ending the Blight.[2] In recognition of this, they were also known as Nerevar-Born-Again,[3] Nerevar Reborn, Starkborn,[4] Moon-and-Star Reborn, Hortator, Mourner of the Tribe Unmourned, Redeemer of the False Gods,[5] and Blodskaal.[6]
As destiny unfolded, they battled against living gods, and then, in the frozen wastes of Solstheim, against the champions of the Daedric Prince Hircine.[2][7][8][9] Rumors swirled at the end of the Third Era that the Nerevarine went on an expedition to Akavir and has not been heard from since.[10]
Biography[edit]
Prolepsis[edit]
At some time soon after the climax of the Battle of Red Mountain, following the disappearance of the Dwemer, Nerevar insisted that he, Almalexia, Sotha Sil, and Vivec swear upon and before Azura never to employ the Tools of Kagrenac in the profane manner that the Dwemer had intended. A few years after the battle, when the Tribunal broke their oath to Nerevar and used Kagrenac's Tools to seize divine power, Azura appeared and cursed them. She assured them that her champion Nerevar would return to punish them for their perfidy, and to make sure such profane knowledge might never again be used to mock and defy the will of the gods. When Sotha Sil dismissed her claims, all Chimer were changed into Dunmer, and she professed that all the Dunmer would share the fate of the Tribunal until the end of time.[11] Despite this, the Heirographa claimed that he lived long enough to bless the new Tribunal as protectors of his people.[12]
Before the Coming of the Nerevarine[edit]
During the time of the Nerevarine, Morrowind was under the rule of the Tribunal, the three living gods of the Dunmer. In the late Second Era, the ancient enemy Dagoth Ur had awoken and was biding his time. Eventually, in the late Third Era, Dagoth Ur struck, releasing the Divine Disease across Vvardenfell and stealing Sunder and Keening from the Tribunal. While the living gods erected the Ghostfence in response, Dagoth Ur has cut off the Tribunal from their source of power and took it for himself. If Dagoth Ur couldn't be stopped, Dagoth Ur would establish a theocracy around the machine god Akulakhan, take over Tamriel as god-priests, and share his divine madness with the rest of the world.[13][14]
Arrival in Morrowind and Recruitment Into the Blades[edit]
A prisoner was released from the Imperial City's prison by Uriel VII's authority and sent to Morrowind with a missive for Caius Cosades. The prisoner was entered as a Novice in the Imperial Order of the Blades, and was to serve under his absolute authority with the exception of Uriel VII's wishes that the Nerevarine Prophecy be fulfilled.[15] The prisoner's first order was to speak with Hasphat Antabolis of the Fighters Guild about the different cults of the Nerevarine and the Sixth House.[16] Upon retrieving a Dwemer Puzzle Box from Arkngthand, Hasphat answered the prisoner's questions and pointed to Sharn gra-Muzgob of the Mages Guild for more information. After retrieving the Skull of Llevule Andrano, Sharn gives the prisoner a note concerning the Nerevarine, their prophecy, and their cult.[17] The prisoner was then promoted to being an Apprentice in the Blades. Following further orders from Caius, the prisoner met with a few informants in the city of Vivec to learn more about the Nerevarine and the Sixth House, and relayed the information back to the spymaster.[18] For this, the prisoner was promoted to the rank of Journeyman. The prisoner then traveled to Ald'ruhn to meet with Hassour Zainsubani to retrieve notes on the connection between the Nerevarine Cult and the Ashlanders.[19] With this information, Caius bid the prisoner to go find the Urshilaku Tribe of Ashlanders and to learn more about the Nerevarine Prophecy. After retrieving the Bonebiter Bow of Sul-Senipul, the prisoner became Clanfriend of the Ashlanders, and was permitted to speak to the Wise Woman of the tribe, Nibani Maesa. She revealed that the prisoner was a potential incarnate of the Nerevarine, the prophesied reincarnation of famed Hortator Indoril Nerevar that would save the Dunmer, defeat the Sharmat, and cast down the false gods.[20]
The Hortator and the Sharmat[edit]
The potential Incarnate received orders from Caius to find a Sixth House base and kill the priest Dagoth Gares. As the Incarnate tracked down the base and fought the ash creatures, they eventually reached the Ash Ghoul Dagoth Gares. The priest spoke of Dagoth Ur inviting the Nerevarine to join him as a friend and submit to his lordship. The Incarnate refused and defeated Dagoth Gares, who managed to curse the Incarnate with Corprus before he died.[21] Concerned about the Incarnate's health, Caius sent them to go to Divayth Fyr in Tel Fyr to hopefully be cured. Upon arriving in Tel Fyr, the Incarnate was tasked with venturing into the Corprusarium and retrieving some enchanted boots. After making their way through the Corprusarium, the Incarnate reached a bloated elf named Yagrum Bagarn. The elf revealed he was not just any elf, but the Last Dwarf, and a former Master Crafter under the service of Chief Tonal Architect Lord Kagrenac. He spoke to the Incarnate and gave them the Dwemer Boots of Flying. In return for giving these boots to Divayth Fyr, the Telvanni mage gave the Incarnate an experimental cure. While not curing Corprus completely, the treatment managed to remove the negative effects of the disease.[22] After this, Caius gave the Incarnate their last mission, to go free the Dissident Priest Mehra Milo from the watch of the Ordinators in the Ministry of Truth and escort her to the Holamayan Monastery. After doing so, Mehra revealed the Lost Prophecies of the Nerevarine. These prophecies revealed the Nerevarine to be an outsider, which made the Incarnate more likely to be the true Nerevarine.[23]
After returning to Nibani, the Incarnate learned of the Seven Trials of the Nerevarine. Since the first two were already completed, Nibani told the Incarnate to speak with Sul-Matuul about the third trial. Before telling the Incarnate of the trial, Sul-Matuul tasks them with braving the halls of the ancient Sixth House stronghold Kogoruhn. The stronghold was defended by Ash Creatures, including two Ascended Sleepers in Dagoth Uvil and Dagoth Reler. After returning with some items, the Incarnate learned the third trial from Sul-Matuul. The trial was in the form of a riddle, but it lead to the Cavern of the Incarnate, where the Incarnate picked up Moon-and-Star from the hands of a statue of Azura. Due to the enchantments on the ring, the fact that the Incarnate could wear it confirmed them as the true Nerevarine.[24]
The task now fell to the Nerevarine to meet with three Great Houses and four Ashlander tribes and convince them to acknowledge his authority. Through various means and challenges, the Nerevarine convinced the Redoran, Telvanni, and Hlaalu Great Houses to name them Hortator, and the Ahemmusa, Erabenimsun, Urshilaku, and Zainab Ashlander tribes to name them Nerevarine. Uniting Morrowind behind him like Nerevar in ages past, it was now time for the Nerevarine to turn their attention to the mad god Dagoth Ur.[25][26][27][28][29][30][31]
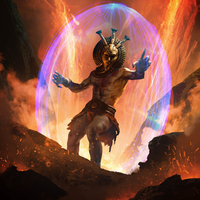
As Hortator and Nerevarine, the hero met with the living god Vivec about his plans on how to defeat Dagoth Ur. Vivec gave the Nerevarine Wraithguard, and detailed the five-step plan to defeating the Sharmat.[32] Following the first phase, the Nerevarine performed reconnaissance on the other side of the Ghostfence to better prepare for the challenges ahead. In accordance with the second phase, the hero systematically raided various Ash Vampire Citadels, defeated the Ash Vampires protecting them, and retrieved numerous artifacts of power. This prevented Dagoth Ur's kin from helping the Sharmat in future battles of the war. The third phase saw the Nerevarine assault Gate Citadel Vemynal, slay Dagoth Vemyn, and recover the legendary artifact Sunder. Likewise, the fourth phase saw the Nerevarine assault Gate Citadel Odrosal, slay Dagoth Ordros, and recover the legendary knife Keening. The fifth phase would see the final confrontation between Hortator and Sharmat under Red Mountain, mirroring the conflict long ago. The Nerevarine fought through hordes of Ash Creatures before finally making their way to Dagoth Ur. The two spoke, as Dagoth Ur attempted to convert the Nerevarine to his cause one last time. The hero rejected the offer, and the two clashed. After a hard fought battle, the Nerevarine struck down the Sharmat, and ventured into Akulakhan's Chamber. Dagoth Ur reappeared, sending hordes of minions at the Nerevarine once again. Fighting through them, the Nerevarine found Dagoth Ur to be invincible in his divinity. The two fought again, but the Nerevarine could do nothing to harm the mad god. Eventually, the Nerevarine found the Heart of Lorkhan, the source of Dagoth Ur's power, in the chest of Akulakhan, Dagoth Ur's mighty golem of destruction. Under the protection of Wraithguard, the Nerevarine struck the Heart of Lorkhan with Sunder, making it corporeal, then cut it using Keening, destroying the enchantments on the Heart and dissipating it across all of Nirn. With this, Dagoth Ur was made mortal once again, and Akulakhan was destroyed. The Hortator slew the Sharmat, and Azura appeared before the hero proclaiming the end of the ruinous Blight. Following the death of Dagoth Ur, The remaining Ash Creatures perished, and the Sleepers finally awoke.[33]
The Mad Goddess and the Ambitious King[edit]
At some point, the Nerevarine was attacked by Dark Brotherhood assassins in their sleep. After defeating the assassins, the Nerevarine followed the assassination plot to the capital city of Morrowind, Mournhold. Upon arrival, the Nerevarine asked the city guards and tracked the Dark Brotherhood to the Great Bazaar in the sewers beneath the city. There, the Nerevarine found the leader of the Dark Brotherhood, Dandras Vules. Upon defeating the assassins, the Nerevarine discovered the assassination contract on them, and deduced it was signed by the new King of Mournhold, Hlaalu Helseth.[34][35] After continuing their investigation, the Nerevarine ended up speaking to the Captain of the Royal Guard, Tienius Delitian. While he confirmed that the king was behind the attack, he ignored this topic. Instead, he roped the Nerevarine into investigating rumors about the death of the previous king, King Llethan. After gaining the trust of the populace, the Nerevarine eventually heard about "The Common Tongue", a publication that was critical of King Helseth. The publication, and the populace, hinted towards King Helseth poisoning the previous king. After reporting this information to Delitian, the captain sent the Nerevarine to report on the Temple's view of King Helseth. After speaking to Galsa Andrano, a healer at Almalexia's Temple, the Nerevarine concluded that Almalexia and the Temple wished to destroy King Helseth if he sought in earnest to be king. Delitian appreciated the Nerevarine's work, and asked them to investigate a potential plot to kill King Helseth among the Royal Guards. Pretending to be a new candidate for the guards, the Nerevarine spoke with the guards and looked around, ultimately finding a suspicious note. The Nerevarine brought the news to Delitian, who concluded that this was proof of disloyalty among the guards.[36] The Nerevarine was tasked with looking into another conspiracy against King Helseth, this time by the previous king's widow Ravani Llethan. The Nerevarine tracked down the three conspirators and killed them on orders of Delitian.[37] At this point, Delitian asked the Nerevarine to look into the Common Tongue publication and to deal with the author. The hero found the author to be Trels Varis, and while it is not known how the Nerevarine dealt with him, Varis stopped publishing about the king.[38] The Nerevarine then spoke with Queen Barenziah about how they may help the crown, and the queen told them of the importance of understanding the dual powers of Mournhold, the monarchy and the temple. As such, she directed the hero to speak with the leader of the Hands of Almalexia, Fedris Hler.[39]
While acting in service to Almalexia, the Nerevarine was tasked by Hler with tracking down a Goblin army supposedly being prepared by King Hlaalu Helseth and killing the two warchiefs in command, as well as the Altmeri trainers assisting the army.[40] After this, Archcanon Gavas Drin sent the Nerevarine to the Shrine of the Dead to kill the Profane Acolytes and cleanse the shrine.[41] After completing this mission, Fedris Hler informed the Nerevarine that Almalexia herself wanted them to retrieve Barilzar's Mazed Band from the Abandoned Crypt in the sewers below the Temple. The band was a powerful artifact capable of creating rifts in space, allowing for teleportation and portal summoning. The band was far more powerful than anticipated, with it even capable of opening the gates of Oblivion itself.[42] After venturing into the crypt, the Nerevarine came across the powerful Lich Barilzar. The hero defeated the lich and claimed the ring before delivering it to the living goddess. With this, the goddess was pleased, and thanked the Nerevarine.[43]
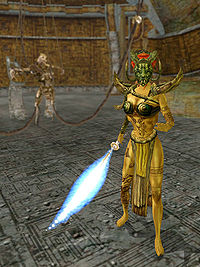
A day later, Fabricants suddenly attacked the city and overwhelmed the city guards. Fortunately, the attack was repulsed due to the help of the Nerevarine.[44] The attack destroyed parts of the Memorial Statue within the city, revealing a Dwemer ruin, and soon the Nerevarine was asked to investigate the ruins due to the mechanical design of the Fabricants. After making their way through the ruins, the Nerevarine found the Fabricants fighting against the Dwarven constructs, proving that the Fabricants were not of Dwemer make.[45] After returning to the Royal Palace, King Helseth finally apologized to the Nerevarine for trying to assassinating him, citing reports that the Nerevarine was vying for the throne. He then asked the Nerevarine to help stop another assassination plot. He sent the hero to meet with an Orc informant named Bakh gro-Sham to learn more about the plot. After returning to the King and informing him that the plot was against his mother Queen Barenziah, the hero was requested to protect her. That night, three Dark Brotherhood assassins entered the queen's bedchamber, where they were stopped by the Nerevarine.[46] However, numerous signs pointed to this being a ruse in order to test the Nerevarine's loyalties.[47] After this, King Helseth requested the Nerevarine duel his personal bodyguard Karrod to prove their worth. After defeating King Helseth's champion, the king gave the hero the Dagger of Symmachus.[48]
By this point, a cult called the End of Times began appearing around Mournhold. They called for the Cleansing, a form of ritual suicide. Almalexia, protector goddess of the city, was concerned about this and wanted to demonstrate her power. Unfortunately, she had expended much of her power in caring for the citizens, so she tasked the Nerevarine with venturing into Bamz-Amschend and activating the Weather Witch inside. The Nerevarine did so, unleashing ashstorms over Mournhold.[49] Afterwards, Almalexia then requested the Nerevarine to eliminate Salas Valor, a former Hand of Almalexia that had begun slandering the goddess due to her changing personality. The Nerevarine killed the former Hand and returned to Almalexia.[50] The living goddess began to see the hero as the Nerevarine, the reincarnation of her long-dead husband Indoril Nerevar, and told them of the two swords Hopesfire and Trueflame. Hopesfire remained with Almalexia, but Nerevar's sword Trueflame was split into three shards and lost. Almalexia gave the Nerevarine one of the shards, and wished them to return the blade to its former glory. The Nerevarine retrieved the second shard from King Helseth's champion Karrod, and found the third shard to be within an artifact in Torasa Aram's Museum of Artifacts. After a sizable donation to the museum, the Nerevarine was allowed to retrieve the shard. The three shards are reforged with the help of Yagak gro-Gluk. The Nerevarine then takes the blade to the ghost of Radac Stungnthumz, a Dwemer weaponsmith. He is able to enchant the blade using Pyroil Tar from the Daedric Shrine of Norenen-dur in the Citadel of Myn Dhrur. With the blade reforged and reignited, the Nerevarine returned to Almalexia.[51] The goddess told the hero of the mad god Sotha Sil, the third member of the Tribunal, and declared him a threat to Morrowind. She asked the Nerevarine to go to the Clockwork City and kill the god using Trueflame. The Nerevarine fought through the city, destroying Fabricants and Factotums as he made their way to Sotha Sil. Upon reaching the god, the Nerevarine realized Sotha Sil was already dead. When the Nerevarine tried to leave the area, Almalexia appeared before them. In her rambling, Almalexia was revealed to be the one who had gone mad from the loss of her divine powers. She revealed that the Fabricant attack on Mournhold was in fact her doing, with the aim of appearing to save the city from the disaster which she in fact caused, thereby rekindling the love of her people. She meant for the Nerevarine to die as a martyr in the city, but they survived, and so she needed to kill them herself. The goddess fought the hero, Trueflame against Hopesfire, until finally the Nerevarine emerged victorious. With Almalexia slain, the Daedric Prince Azura once again appeared to the Nerevarine. She declared that Almalexia had gone mad, and rid Mournhold of the ashstorms. The Nerevarine returned to Mournhold and informed King Helseth of what transpired.[52]
The Bloodmoon Prophecy[edit]
During the time of the Nerevarine, rumors began spreading about the island of Solstheim, and the imperial fort on it. Eventually word reached the ears of the hero, who travelled to Solstheim. Arriving at the fort, the Nerevarine spoke with the commanding officer, Captain Falx Carius. The captain revealed that the morale in the fort had been low, and he suspected that his soldiers needed drinks. After a brief investigation, the Nerevarine discovered that the fort's priest, Antonius Nuncius, had been hiding alcohol for the "benefit of the soldiers". Whether the hero exposed this to the captain or not is unknown, but regardless the soldiers were able to drink again. With the Nerevarine's usefulness to the fort made clear, Captain Carius asked the hero to investigate reports of weapons smuggling. After asking around the fort, the Nerevarine heard of two soldiers going to Gandrung Caverns for a weapons stash. The Nerevarine journeyed to the cave and found the smugglers, ending the operation with either force or diplomacy. The Nerevarine returned to the fort to continue to offer assistance, but by then the fort had been attacked and the captain had gone missing.[53][54][55][55][56]
Asking the soldiers, the Nerevarine discovered that wolf creatures had attacked the fort. The hero was sent to go visit the Nordic tribe in the Skaal Village, since they might have had information on what the creatures were. The leader of the Skaal, Tharsten Heart-Fang, claimed that the tribe had nothing to do with the attack, and added that the creatures that attacked were not the wolves of the island. Tharsten continued by saying the presence of the Imperials upset the natural balance on the island, and asked the Nerevarine to perform rituals on the Standing Stones around the island. After completing the rituals, natural harmony was returned and the power of the Skaal was restored. With the hero's loyalty proven, Tharsten then asked the Nerevarine to complete a test of wisdom. The Nerevarine investigated the theft of furs in the village, and successfully solved the crime. Lastly, Tharsten asked the hero to complete a test of strength. Speaking with Korst Wind-Eye, the village shaman, he told the Nerevarine about a large pillar of fire emerging from Lake Fjalding. Tharsten blamed it on a Draugr Lord named Aesliip. Venturing into the caves beneath the lake, the Nerevarine fought the Draugr Lord and stopped a wave of Frost Atronachs. Upon returning, the Nerevarine discovered that the Skaal Village was under attack by werewolves, and Tharsten had gone missing. The Nerevarine helped stop the attack, but not before contracting lycanthropy. Whether the Nerevarine decided to cure the disease or not is unknown.[57][58][59][60]
Stories vary on what exactly occurred after the werewolf attack on the Skaal Village. One variation of the story has the Nerevarine cure the disease and become a blood friend of the Skaal. The Nerevarine was then asked by Korst to retrieve the Totem of Claw and Fang from the Tombs of Skaalara. Using the totem, the Nerevarine was able to complete the Ristaag, a ritual to hunt the Spirit Bear, after defending some villagers from more werewolves. After a horker massacre left scores of the animals dead on the shore, Korst was left wondering what could have done it. He asked the Nerevarine to investigate Castle Karstaag, the home of the frost giant Karstaag and his riekling servants. Following the dead horker trail, the Nerevarine discovered a small civil war between the rieklings that was thrown into chaos by grahls attacking. The Nerevarine slew the grahls and moved into the center of the castle. In addition, the Nerevarine discovered that Karstaag had been taken by werewolves a few days prior, and that the riekling servants had been running the castle since. After returning to the Skaal Village, a perturbed Korst thanked the Nerevarine and told the hero of the Bloodmoon Prophecy. The prophecy tells of the Hunter coming to Nirn once every era in order to collect mortals for his Great Hunt. The first sign was the coming of the Hunter's Hounds, with the werewolves appearing on the island. The second sign was the Fire from the Eye of Glass, which was the pillar of flame emerging from Lake Fjalding. The third sign was the Tide of Woe, which was the horker massacre. Lastly, there was the Bloodmoon, when Secunda turned crimson red when the Nerevarine arrived on Solstheim. After this, the Nerevarine rested for the night, but was captured in their sleep by Hircine's Hounds and brought to Mortrag Glacier.[61][62][63]
Based on another variation of the story, the Nerevarine refused to be cured of lycanthropy and became a werewolf. The Skaal likewise refused to associate with the Nerevarine, since the Nerevarine now bore the mark of the wolf. After some time, a mysterious figure appeared to the Nerevarine in a dream and orders the hero to defend the Totem of Claw and Fang. At the Tombs of Skaalara, the Nerevarine slew more than a dozen Skaal hunters and successfully kept the totem out of Skaal hands. Hircine soon visited the hero again and thanked the Nerevarine for defending the totem, and promised to stay in contact. In due time, Hircine appeared again to tell the Nerevarine to interrupt the Skaal ritual known as the Ristaag, the hunt for the Spirit Bear. After slaying the Skaal trackers, the Nerevarine hunted the Spirit Bear for Hircine as well. A short while later, Hircine once again contacted the hero and called for the Nerevarine's help in defending Castle Karstaag from a rebellion. The Nerevarine arrived and slew the grahls and the riekling rebels in the castle, and Hircine rewarded the Nerevarine. Soon afterwards, Hircine called the Nerevarine to Mortrag Glacier.[64][65][66]
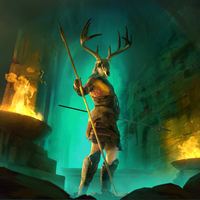
Regardless of how the Nerevarine wound up in Mortrag Glacier, Hircine then declared his intentions. He brought the four strongest warriors on Solstheim together to act as his prey in his Great Hunt. These warriors were Captain Falx Carius, Tharsten Heart-Fang, Karstaag, and the Nerevarine. Each warrior was to fight through the maze inside of the Mortrag Glacier until only one was left, and then this survivor would fight Hircine himself. The Nerevarine began traversing the maze, before coming across Captain Carius. Deciding to work together, the two warriors fought through numerous werewolves. It is unknown if Captain Carius died during the fight or just stayed behind, but only the Nerevarine used the key to enter the inner circle. Here, the Nerevarine came across Tharsten, who also decided to team up with the hero. The two fought through werewolves again, until Tharsten revealed himself to also be a werewolf. Eventually, the Nerevarine slew the leader of the Skaal and obtained Hircine's Ring as well as another key. The Nerevarine used this key to enter the Huntsman's Hall, before coming face to face with Karstaag. The frost giant chose to fight the Nerevarine, and they clashed. Ultimately, the Nerevarine prevailed, and moved on to face Hircine. The Daedric Prince of the Hunt asked the Nerevarine to pick an aspect to face, between the bear aspect of strength, the wolf aspect of speed, and the humanoid aspect of guile. The Nerevarine fought the chosen aspect in a mighty clash, god against god-killer. After a hard-fought battle, the Nerevarine emerged victorious. Shocked, Hircine vowed to return in the next era. Mortrag Glacier began to fall apart and crumble, but the Nerevarine exited through a portal. At this point, the Nerevarine returned to Korst Wind-Eye and informed the shaman about what happened, including Tharsten Heart-Fang's death.[67]
Legacy and Fate[edit]
—An Excerpt from the Nerevarine's Journal
By 3E 432, the Empire reported that Almalexia, Dagoth Ur, Sotha Sil (and possibly Vivec) were destroyed in the "Nerevarine's fury" and that the Nerevarine likewise had vanished.[1] By the time of the Oblivion Crisis, it was rumored that the Nerevarine went on an expedition to Akavir and had not been heard from since.[10] During the fall of Ald'ruhn, prayers to the Nerevarine went unanswered as the city swarmed with Daedra.[UOL 1][9]
Reputation[edit]
During their travels of Vvardenfell and Solstheim, the Nerevarine was involved in many quests, earning many titles and adding to their renown:
The Nerevarine joined a Great House. Reports conflict on whether they joined House Hlaalu, House Redoran, or House Telvanni. Whichever the case may be, they rose to the highest rank of that Great House.[68][69][70]
The Nerevarine joined the Fighters Guild, eventually rising through the ranks to become the new Guild Master.[71]
The Nerevarine joined the Thieves Guild, eventually rising through the ranks to become the new Master Thief.[72]
The Nerevarine joined the Mages Guild eventually positioning themselves to replace Trebonius Artorius as Arch-Mage. An official decree by Chancellor Ocato was sent down informing him to step down and concede all leadership to the Nerevarine and cease all active duties,[73] although reports conflict on if the Nerevarine delivered this decree to Trebonius or if he simply challenged him to open combat in the Vivec City Arena and killed him.[74]
The Nerevarine joined the Imperial Legion eventually becoming the new Knight of the Imperial Dragon after defeating Varus Vantinius in the Vivec City Arena.[75]
The Nerevarine joined the Imperial Cult rising through the ranks to become a Primate.[76]
The Nerevarine joined the East Empire Company eventually reaching the rank of Factor.[77]
The Nerevarine joined the Morag Tong eventually positioning himself to replace Eno Hlaalu as the new Grandmaster. It is unknown if the Nerevarine allowed Eno to retire gracefully or killed him.[78]
The Nerevarine joined the Tribunal Temple rising through the ranks to become a Patriarch.[79]
The Nerevarine was appointed the new chieftain of Thirsk Mead Hall after slaying the Udyrfrykte.[80]
There are conflicting reports on whether the Nerevarine joined a vampire clan after being infected with vampirism. From here reports diverge on whether they joined the Aundae Clan, the Berne Clan, or the Quarra Clan.[81][82][83] Additionally, it is unknown if the Nerevarine sought out a cure for their vampirism.[84]
Gallery[edit]
Notes[edit]
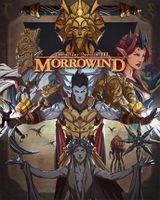
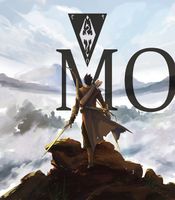
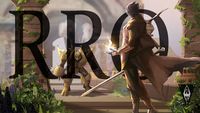
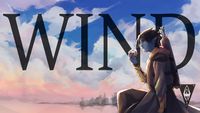
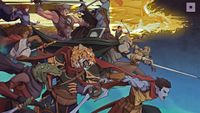
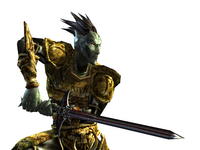
- The artwork drawn long after the release of Morrowind is based off a render from the pre-release screenshots of a generic Dark Elf player character, matching the hairstyle and bonemold armor seen in the render. Though the render was initially simply meant to display Dark Elves as one of the playable race options, the same as any of the other race renders, it was retroactively used as a basis.
- In Morrowind the player is given the choice to deny being the Nerervarine.[85] Bethesda as a company has committed to not confirming whether the player character of Morrowind is truly Nerevar Reborn, so as to leave it up to the players discretion.[UOL 3]
See Also[edit]
- For game-specific information, see the Morrowind article.
References[edit]
- ^ a b Pocket Guide to the Empire, 3rd Edition: The Temple: Morrowind — Imperial Geographical Society, 3E 432
- ^ a b Events of Morrowind
- ^ Generic dialogue regarding Ghostfence in Morrowind
- ^ Package for Caius Cosades/Decoded
- ^ Peakstar's dialogue during The Path of the Incarnate in Morrowind
- ^ Korst Wind-Eye's dialogue in Morrowind: Bloodmoon
- ^ Neloth's dialogue in Skyrim: Dragonborn
- ^ Events of Morrowind: Tribunal
- ^ a b Events of Morrowind: Bloodmoon
- ^ a b Radiant Conversations in Oblivion
- ^ The Battle of Red Mountain — Vivec
- ^ Saint Nerevar
- ^ Dagoth Ur's Plans — Tribunal Temple
- ^ Dagoth Ur's dialogue in Morrowind
- ^ Decoded package — Glabrio Bellienus
- ^ Events of Antabolis Informant in Morrowind
- ^ Events of Gra-Muzgob Informant in Morrowind
- ^ Events of Vivec Informants in Morrowind
- ^ Events of Zainsubani Informant in Morrowind
- ^ Events of Meet Sul-Matuul in Morrowind
- ^ Events of Sixth House Base in Morrowind
- ^ Events of Corprus Cure in Morrowind
- ^ Events of Mehra Milo and the Lost Prophecies in Morrowind
- ^ Events of The Path of the Incarnate in Morrowind
- ^ Events of Redoran Hortator in Morrowind
- ^ Events of Hlaalu Hortator in Morrowind
- ^ Events of Telvanni Hortator in Morrowind
- ^ Events of Urshilaku Nerevarine in Morrowind
- ^ Events of Ahemmusa Nerevarine in Morrowind
- ^ Events of Zainab Nerevarine in Morrowind
- ^ Events of Erabenimsun Nerevarine in Morrowind
- ^ Events of Hortator and Nerevarine in Morrowind
- ^ Events of The Citadels of the Sixth House in Morrowind
- ^ Events of Dark Brotherhood Attacks in Morrowind: Tribunal
- ^ Events of Hunt the Dark Brotherhood in Morrowind: Tribunal
- ^ Events of Disloyalty Among the Guards in Morrowind: Tribunal
- ^ Events of Evidence of Conspiracy in Morrowind: Tribunal
- ^ Events of Muckraking Journalist in Morrowind: Tribunal
- ^ Events of Queen Barenziah in Morrowind: Tribunal
- ^ Events of The Goblin Army in Morrowind: Tribunal
- ^ Events of The Shrine of the Dead in Morrowind: Tribunal
- ^ Torasa Aram's dialogue in Morrowind: Tribunal
- ^ Events of Barilzar's Mazed Band in Morrowind: Tribunal
- ^ Events of An Attack on Mournhold in Morrowind: Tribunal
- ^ Events of Investigate Bamz-Amschend in Morrowind: Tribunal
- ^ Events of An Assassination Attempt in Morrowind: Tribunal
- ^ Plitinius Mero's dialogue in Morrowind: Tribunal
- ^ Events of Helseth's Champion in Morrowind: Tribunal
- ^ Events of A Show of Power in Morrowind: Tribunal
- ^ Events of The Missing Hand in Morrowind: Tribunal
- ^ Events of The Blade of Nerevar in Morrowind: Tribunal
- ^ Events of The Mad God in Morrowind: Tribunal
- ^ Events of An Island to the North in Morrowind: Bloodmoon
- ^ Events of Rebellion at Frostmoth in Morrowind: Bloodmoon
- ^ a b Events of The Frostmoth Smugglers in Morrowind: Bloodmoon
- ^ Events of The Disappearance of Captain Carius in Morrowind: Bloodmoon
- ^ Events of The Skaal Test of Loyalty in Morrowind: Bloodmoon
- ^ Events of The Skaal Test of Wisdom in Morrowind: Bloodmoon
- ^ Events of The Skaal Test of Strength in Morrowind: Bloodmoon
- ^ Events of The Siege of the Skaal Village in Morrowind: Bloodmoon
- ^ Events of The Totem of Claw and Fang in Morrowind: Bloodmoon
- ^ Events of The Ristaag in Morrowind: Bloodmoon
- ^ Events of The Castle Karstaag in Morrowind: Bloodmoon
- ^ Events of Dream of Hircine in Morrowind: Bloodmoon
- ^ Events of Disrupt the Skaal Hunt in Morrowind: Bloodmoon
- ^ Events of Siege of Castle Karstaag in Morrowind: Bloodmoon
- ^ Events of Hircine's Hunt in Morrowind: Bloodmoon
- ^ House Hlaalu quests in Morrowind
- ^ House Redoran quests in Morrowind
- ^ House Telvanni quests in Morrowind
- ^ Fighters Guild quests in Morrowind
- ^ Thieves Guild quests in Morrowind
- ^ Letter from Ocato — Chancellor Ocato
- ^ Events of Arch-Mage in Morrowind
- ^ Events of Grandmaster Duel in Morrowind
- ^ Imperial Cult quests in Morrowind
- ^ East Empire Company quests in Morrowind: Bloodmoon
- ^ Events of Grandmaster in Morrowind
- ^ Tribunal Temple quests in Morrowind
- ^ Events of The Mead Hall Massacre in Morrowind: Bloodmoon
- ^ Aundae Clan quests in Morrowind
- ^ Berne Clan quests in Morrowind
- ^ Quarra Clan quests in Morrowind
- ^ A Cure for Vampirism quest in Morrowind
- ^ Nerevarine's dialogue with Dagoth Ur in Morrowind
Note: The following references are considered to be unofficial sources. They are included to round off this article and may not be authoritative or conclusive.
- ^ The Fall of Ald'ruhn
- ^ Michael Kirkbride's Posts
- ^ Kane, A. (27 March 2019). Morrowind: An oral history. Polygon.
| |||||||||||||
