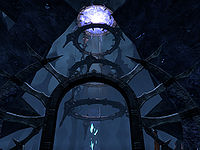
Online:Soul Shriven in Coldharbour
| To meet our site's higher standard of quality, this article or section may require cleanup. The user who placed this here had the following concern: Article needs to be updated following restoration of Soul Shriven in Coldharbour as the Tutorial quest since Update 44 To leave a message about the cleanup for this article, please add it to this article's talk page. |
|
||||||||||||||||||
Quick Walkthrough[edit]
- Locate The Benefactor.
- Listen to Lyris Titanborn and escape the prison cell.
- Talk to The Prophet and head into the Bleeding Forge.
- Head into the Towers of Eyes and destroy a Coldharbour Sentinel.
- Talk to Cadwell then enter the Undercroft.
- Reach the Prophet's Cell and disable the Dark Pinions.
- Enter the Anchor Mooring and defeat the Child of Bones.
- Escape Coldharbour.
Detailed Walkthrough[edit]
A Hooded Figure[edit]
| You will only start the quest here if you completed The Gates of Adamant or a previous tutorial quest. New players will start this quest from Prison Break. |
When you first arrive in a major city, you will be approached by a hooded figure, who'll ask to speak to you. If you don't talk to her when she approaches you there, you can find her fixing a wagon in the city later on. Either way, you'll need to speak with her.
- "Greetings. My benefactor wishes to speak to you about a matter that could affect the fate of our world."
- What does your benefactor want?
- "If my benefactor wished to discuss details in the open, why send a messenger? The matter is for your ears only."
- Fine then.
- "My benefactor awaits nearby. Do not tarry."
- I'll go now.
 If you are a member of the Aldmeri Dominion, travel to the ship The Interim Suitor at the Vulkhel Guard docks. Unless you've already completed the quest The Tempest Unleashed, in which case you will be directed to Daggerfall or Davon's Watch instead.
 If you are a member of the Daggerfall Covenant, you will need to head to the Patheirry House in Daggerfall.
 If you are a member of the Ebonheart Pact, go to the Sadreno House near the western gate of Davon's Watch.
Inside, you'll find the benefactor. However, they're incapacitated, and unable to speak. A trio of Worm Cultists will appear, initiating a cutscene that culminates in your murder at the hands of Mannimarco, and your consignment to the Wailing Prison in Coldharbour.
Prison Break[edit]
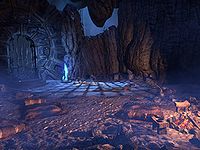
You find yourself locked in a cave-like cell littered with bones, located deep within the bowels of Coldharbour. As you approach the door, a manifestation of The Prophet appears. After you finish speaking with him, Lyris Titanborn will walk up to the outside of your cell door.
- Lyris Titanborn: "Whoa there! Are you alright?"
- Lyris Titanborn: "The name's Lyris."
- Lyris Titanborn: "I hope you've still got some fight left in you. You're going to need it."
Exit the cell and follow Lyris over to the body of a Dremora Churl. If you're playing through the quest as the tutorial, she'll instruct you to pick up its weapon (which will vary based on your Class). Once you have done so, follow Lyris down the passageway. As you continue through the dark tunnels, another Dremora Churl appears. If you're playing through this quest as a tutorial or after Update 44, it freezes the action to guide you though attacking the enemy. Otherwise, you're free to kill it on your own. Once it is defeated, continue to follow Lyris into a larger room. Three Soul Shriven prisoners are trying to keep a door closed, while something large pummels it from the other side. One of them, an Argonian named Er-Jaseen, calls out as you approach to keep going.
Lyris will agree, and move on. As you enter a room filled with a number of torture cages, a Dremora Kynval appears. The tutorial guides you through blocking an enemy's heavy attack, indicated by the yellow starburst around the enemy, and exploiting the resulting effect of them being knocked off balance using a heavy attack yourself. Afterwards, you are immediately confronted by a Dremora Kyngald, who begins to cast a spell. Here, you are introduced to interrupting a special attack, indicated by the red starburst. Once again, you can exploit while the enemy is disoriented. A disoriented or off-balance enemy is indicated by the swirling circle around their head.
After defeating the enemies, Lyris will call you over to talk, where you can finally ask her some questions. Once she learns you've spoken to the Prophet, she explains that breaking him out is the only hope of escaping Coldharbour—apparently he's the only person alive who has a way out. Lyris says that you'll need to distract Molag Bal by breaking one of the Sentinels he uses to see in Coldharbour at the Tower of Eyes. You can ask Lyris about many things before moving on. Once the conversation has ended, head into the Bleeding Forge.
Blinding the God of Brutality[edit]
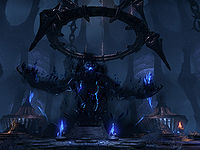
When you enter the forge, you see Vaekar the Forgemaster murder a Soul Shriven. He attacks you and Lyris next. Kill him to continue, and once you've defeated him Lyris will congratulate you on your skills. If you are playing this quest as the tutorial, opening the character menu shows that you are now at level 2, and you have gained a skill point. You have also gained an attribute point, which can now be used to increase either your Health, Magicka or Stamina. The Prophet will also comment on the battle from afar, urging you to keep moving as Molag Bal knows you've escaped. Follow the tunnel to reach a door that leads to the Towers of Eyes.
The Sentinels are connected, so destroying one will distract Molag Bal and keep him from seeing you. Proceed down the stairs ahead. There's Sentinels on the hill south across the bridge and east of the stairs you just descended. Make your way to either. Once there, Lyris will warn you not to get caught again after escaping so recently. Here, the tutorial introduces sneaking, and you must attack the Sentinel without it seeing you by approaching it from behind. If it sees you, it will stun you for a short time and apply the effect "Eye of the Sentinel". Otherwise, simply hit it once. After you destroy the Sentinel, Lyris tells you to hurry to the Prophet's cell, the entryway being east of the southern Sentinel hill.
As you approach the gate, it bursts into a ward of blue arcane fire, and Molag Bal himself speaks.
- Molag Bal: "Fool! You will never escape my realm."
- Lyris Titanborn: "Herma-Mora's wagging tongue! The door's warded. We'll never get in this way."
Lyris says that this route won't work, and suggests that you find another Soul Shriven named Cadwell. Cadwell is eccentric, but knows Coldharbour better than anyone else, and might know of another way to reach the Prophet.
Detour[edit]
Head downstream along the river to find a small gathering of Soul Shriven by a campfire, surrounding Cadwell as he plays the lute, singing a nonsensical song. Speak to him, and he'll joyfully greet you. He directs you to a route further along the river that leads to the Undercroft, which is filled with traps and enemies. You can ask him about a few things. When you're done, he wishes you luck and tells you to give the Prophet his best.
Lyris warns that Cadwell probably made the route ahead sound much less dangerous than it is, and suggests caution. She'll then proceed to run down the river, and you should follow. You'll find that the door to the Undercroft is locked. This introduces the Lockpicking system, and you have 60 seconds to try to pick the lock—unlike most other locks in the game. Once you have successfully picked it, or just forced it open, you can enter the Undercroft.
The Undercroft is lined with traps and corpses. Head forward, and a skeletal warrior will dig its way out of the ground. Dispatch it and continue forward, taking care to avoid the numerous flamethrower traps lining the walls. Continue to traverse your way though the winding tunnels and pools of water until you reach a staircase leading up to the Prophet's Cell.
A Prophet for a Warrior[edit]
As soon as you enter the cell, Lyris will speak.
- Lyris Titanborn: "The Prophet's cage should be just ahead. Quickly now! We haven't much time."
- Lyris Titanborn: "All right. The good news is, we made it here in one piece and the Prophet looks unharmed."
- Lyris Titanborn: "Now the bad news. It's going to be up to you to keep him safe and get him back to Tamriel. I'm not going with you."
Follow her to reach a vast cavern housing a number of spiked rock formations, piles of spent Soul Gems and pools of Azure Plasm. At the center of the room is a large ritual circle, above which the Prophet hangs in a magical force-field. Speak to Lyris to find out the plan: Lyris will swap herself with the Prophet, as the only way to remove him from the cell requires switching him out for someone with a living soul. This naturally precludes you from sacrificing yourself. Tell her when you're ready, and she will conclude by telling you to protect the Prophet, who will know where you need to go.
When you have finished speaking, you will need to defend Lyris from two Dremora Baunekyns. When you defeat each one, its essence will fly off to feed a respective Dark Pinion. The two Dark Pinions are found on the north and south sides of Lyris. Head over to each one and disable it. Once this has been completed the exchange will begin to take place. Lyris and the Prophet are swapped, and the Prophet collapses onto the ground where Lyris was.
- The Prophet: "Freedom. I remember this feeling. It will be fleeting though, if Molag Bal has his way."
The Prophet is happy to see that you're safe. He says that once you've escaped, you'll find a way to rescue Lyris. You can ask him some questions before he hurries you to the Anchor, a Daedric machine that binds Nirn to Coldharbour. If you can lead him there, he can use it to get the two of you out and back to Tamriel. Head up the stairs on the other side of the room and through the tunnel into the Anchor Mooring.
Freedom[edit]
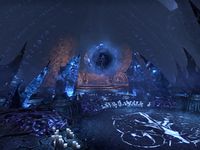
Proceed into the Anchor Mooring. Suddenly, Molag Bal appears before you.
- Molag Bal: "the mortal thinks it can defy me. Futile. Soon your world will be in my chains."
He disappears and summons the Child of Bones. The Prophet will run ahead and say: "Come, I will protect you!" During battle, the bone colossus will primarily use melee attacks. There will also be one final tutorial instructing you how to break free of a crowd-control effect. Once the colossus has been defeated, the Prophet will call to you. Speak to him, to learn that you'll need a skyshard (Aetherial magicka carrying the essence of Nirn) to maintain a physical body back on Nirn. He summons one, which you should interact with. Once the power has been absorbed, you will receive a short message outlining skyshards in the tutorial. Once you have collected it, blinding light fills the room and the Prophet begins his ritual.
- The Prophet: "Great Akatosh, Dragon God of Time! I require your strength! Let the way be opened! Let these wandering souls return home! Let the will of Molag Bal be denied!"
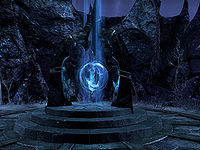
As soon as the ritual is complete, the entire anchor mooring fizzles with lightning and a large rift opens up at the top. The Prophet yells: "Hurry! We must go now." and runs forward up the staircase. As he reaches the top, the anchor levitates him up from the ground and into the portal. Follow him, and escape to Tamriel.
Back to Tamriel[edit]
You will be transported to one of three locations based on the faction you have joined:
 Members of the Aldmeri Dominion will find themselves in Khenarthi's Roost, with the option to go to Auridon after awakening.
 Members of the Daggerfall Covenant will find themselves in Stros M'Kai, with the option to go to Glenumbra after awakening.
 Members of the Ebonheart Pact will find themselves in Bleakrock Isle, with the option to go to Stonefalls after awakening.
You will awaken next to a projection of the Prophet. Talk to him, and he'll tell you that the two of you have ended up in different places. Where he will say he is depends on your faction.
 If you are part of the Aldmeri Dominion, he will say: "I am in a city near the sea, in a land of eternal spring. The air smells of the ocean, and of markets, and gardens."
 If you are part of the Daggerfall Covenant, he will say: "I am in a city of industry, where men speak of intrigues and plots beneath layers of innuendo and pleasantry."
 If you are part of the Ebonheart Pact, he will say: "I am in a place with the smell of burning ash on a hot wind, and the sounds of a distant battle."
Regardless of where he says he is, the Prophet will conclude that it doesn't matter and will set you on your path. You can ask him about a few things. He doesn't know how long you were unconscious, but knows that someone picked you up and that he's going to try to figure out how to help Lyris. The Prophet will have additional dialogue about your current location and the first quest in the alliance questline, which will also vary based on the faction you are part of. The next main quest, The Harborage, does not begin straight away; rather, the Prophet will contact you through an ethereal projection when you enter a safe area, such as a settlement.
Achievement[edit]
You will earn the following achievement for completing this quest:
| Achievement | Points | Description | |
|---|---|---|---|
| Soul Shriven in Coldharbour | 10 | Complete Main Quest Chapter 1. | |
Alliance Story[edit]
After completing the quest, the Prophet will elaborate on the situation in Tamriel:
- "Be wary, vestige. Our very plane of existence is in peril. The threat of Molag Bal looms across all Tamriel, and chaos spreads in its shadow.
- Danger roams the land and will assume many forms. Do not let it catch you off-guard."
- Where should I go?
- "You must find your own path. But perhaps there is a reason for the place in which you find yourself.
- Explore. Search for a cause to lend your hand. Join with others. You might even seek out those who rescued you from the sea. The choice is yours."
- You think there are many who need my help?
- "Indeed. I sense that even now there are good people near you who face grave danger. They need your assistance should you be willing to give it.
- To thwart the will of Molag Bal, we must skirmish with evil wherever it rears its head."
- And there are others who would join me in this?
- Who would I join up with?
- "We do not face these troubled times alone. Many shall rise up to fight this tide of darkness.
- Wherever you go, you will encounter others who share your courage and valor. Help them if you can, and enlist their aid if you have need of it."
Upon exiting the location you wake up in, you will meet someone who will present you with the introductory quest for your alliance if you have not started it already.
 Aldmeri Dominion: Razum-dar will offer the quest Storm on the Horizon.
 Daggerfall Covenant: Tumma-Shah will offer the quest The Broken Spearhead.
 Ebonheart Pact: Captain Rana will offer the quest A Beginning at Bleakrock.
Notes[edit]
- Prior to Update 30, this was the tutorial quest for anyone who did not own any chapters (beginning at Prison Break). After Update 30, The Gates of Adamant was the tutorial quest for all players, until it was retired in Update 44 and Soul Shriven in Coldharbour was restored to this role.
- Skipping the current tutorial will cause the Soul Magic skill line to be unlocked from the start, rather than having to complete the Soul Shriven in Coldharbour quest to obtain it.
- Prior to Update 10, you were sent to Auridon, Glenumbra or Stonefalls at the conclusion of the tutorial, requiring you to backtrack to the "starter islands" in order to play the storyline quests in the intended order.
- Prior to Update 6, Er-Jaseen had a more prominent role, including being the character who broke you out of your prison cell.
- During the beta, you were sent to Khenarthi's Roost, Stros M'Kai or Bleakrock Isle as you are now, but you were forced to complete those quests before gaining access to the mainland. This was viewed unfavorably by players and reviewers, resulting in the pre-Update 10 setup of being sent straight to the first main zone.
- At one point in the game's development, three quests were planned to be concurrent with Soul Shriven in Coldharbour: The Nameless City, Molag Bal's Gaze, and Uprising. All three involved you and one of three other soul-shriven finding ways to secure your escape route, including securing weapons for an uprising and collapsing tunnels to prevent Daedric reinforcements from quelling the slave revolt. The portion of Soul Shriven in Coldharbour that involves blinding Molag Bal's gaze over the Wailing Prison was originally relegated to one of these three quests.
Quest Stages[edit]
<Alias=LocationHold>) is dynamically set by the game and will be filled in with the appropriate word(s) when seen in game.
- Not all Journal Entries may appear in your journal; which entries appear and which entries do not depends on the manner in which the quest is done.
- Stages are not always in order of progress. This is usually the case with quests that have multiple possible outcomes or quests where certain tasks may be done in any order. Some stages may therefore repeat objectives seen in other stages.
