Skyrim:Faldar's Tooth
|
|||
|---|---|---|---|
| # of Zones | 1 | ||
| Clearable | Yes | ||
| Dungeon | Yes | ||
| Respawn Time | 10 days or 30 days | ||
| Level | Min: 6 | ||
| Occupants | |||
| Bandits, Wolves, Skeevers | |||
| Important Treasure | |||
| Proper Lock Design The Lunar Lorkhan The Marksmanship Lesson |
|||
| Console Location Code(s) | |||
| FaldarsToothExterior01, FaldarsToothExterior02, FaldarsTooth01 | |||
| Region | |||
| The Rift | |||
| Location | |||
| West of Riften East of Heartwood Mill |
|||
| Special Features | |||
| # of Tanning Racks | 1 | ||
| # of Forges/Anvils | 1 | ||
| # of Grindstones | 1 | ||
| # of Cooking Pots/Spits | 1 | ||
| # of Fishing SuppliesCC | 1 | ||
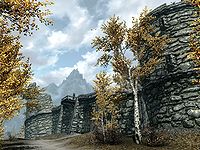
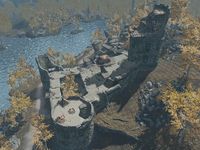
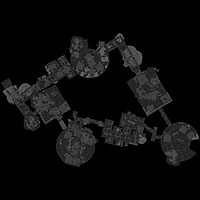
Faldar's Tooth is a medium-sized fort west of Riften containing bandits, wolves, and skeevers. It contains only one zone, Faldar's Tooth.
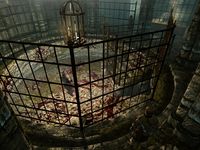
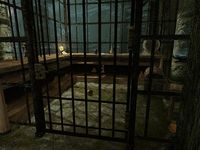
The bandits force the wolves to fight in a central pit for the entertainment of Nords who come to watch and bet on the outcome of the fights.
Related Quests[edit]
- Amulet of the Moon: Find the Moon Amulet for Kharjo. (radiant)
- Arniel's Endeavor: Uncover an ancient Dwemer secret. (radiant)
- Retrieval: Journey to a random location to retrieve a fragment of Wuuthrad. (radiant)
- BloodthirstCC: Find a cursed blood-drinking sword.
- This location is one of many potential targets for one or more of the Radiant quests.
Walkthrough[edit]
Exterior[edit]
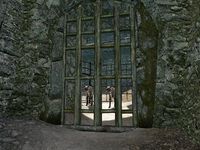
As soon as you approach this fort, even if you haven't been detected, you can hear one of the bandits say "Give them the dogs boys!" At this point the outer wooden gate slowly descends, releasing two pit wolves. There are five bandits on guard around the walls of the fort, including one standing outside the fort wall on the northwest side of the tallest tower. The others can generally be found as follows: one on the east wall, one on the middle level near some tents, and the final two on the higher level—one inside and one outside of a large tent. The walls of the fort are crumbling and have been shored up and patched with wooden palisades and platforms in places. The corner tower to the southwest has collapsed and there is a point between this and a wooden platform where, with careful climbing and jumping, it is possible to enter the fort's exterior without having to pass through one of the two entrances. The two entrances are to the east and south, with the former being past the two wolves that are released, and the other through an adept-locked gate. They both lead into small courtyards and give access to the main part of the fort's interior. With the Fishing Creation installed, some Fishing Supplies can be found on the dock to the south. Fish from Temperate Lakes can be caught here.
The entrance to the east past the wolves leads to a separate courtyard with two doors to the interior; however, one of these is blocked by rubble. Beyond the locked gate to the south, the courtyard contains a wooden door leading to the interior on your right and an empty gated area, where the gate can not be interacted with, against the south wall to the left of the gate. The adept-locked front gate can be opened using a key found in a tent on a higher level of the exterior. Opposite the empty gated area is a flight of stone stairs leading up to the middle level of the exterior, which contains three small tents—one against the north wall, one near the stairs, and the third near the west wall. All have bedrolls in them, and the third has a campfire in front of it. To the south there are a ramp and bridge leading up to a platform. From there, across another bridge to the highest level, there is a large tent near a lit campfire and the tallest tower; inside is a bedroll and table. On the table are eight loose coins and the key to the southern entrance gate and tower to the east, while under the table is an apprentice-locked chest.
Faldar's Tooth[edit]
Entry Tower[edit]
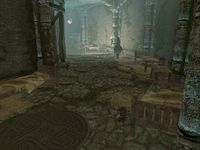
The interior is arranged in a circuit. Only the southwestern entrance allows you to choose to travel in either direction around the interior, due to a wooden gate with only a chain on that side. The interior of the fort seems to have suffered a lot of damage over the years and contains a lot of empty wine bottles throughout and several fly amanita fungus growing in the damp environment.
Beyond this door is a narrow corridor with a level-locked cage on the right, which contains a bedroll. After a couple of turns the corridor opens into a small room with a couple of small cages that are normally found hanging and a couple of torture racks, with a pair of random boots on your right.
Forge[edit]
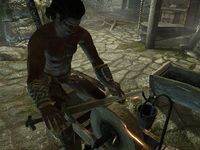
There is a doorway opposite that leads out to the top of a curved staircase with a falling boulder trap and a lever to activate it to the left. Partway down the stairs there is a tripwire that will also trigger this trap. At the bottom of the curved stairs there is a wooden door on the west wall and a wooden gate with a chain to the right that lowers it. Behind the door a flight of narrow stairs leads up. At the top there are many thick roots coming through from above in front of you. Off to the left is a bandit using a forge or grindstone. The forge is in the southern corner with the grindstone to the right. Against the southeast wall is a set of shelves holding seven pieces of iron ore, a piece of silver ore, and a novice-locked chest. Behind the grindstone is a second set of shelves holding a quiver of steel arrows and an iron sword, with a workbench and sideboard that have been crushed by falling masonry and an iron greatsword on the ground to the right of this. To the east around a central pillar is the path onward and a small campfire at the top of a flight of stairs that descend to the northwest.
At the bottom is a shallowly flooded room with a wooden slatted path and several bear traps. There is a skeever in this room that may be already dead from being caught in a trap. The doorway out of this room is to the southwest and is trapped with a tripwire that triggers a skull ram. It comes from northwest and travels across the front of the doorway inside the room, so passing in this direction it is safe to trigger it.
Beyond the doorway are two patches of fly amanita fungus next to a caved-in section on the left. To the right there is a bandit archer near three stalls separated by stone walls, each area having a stool and bucket. On the separating walls are three common books, a potion of the warrior, and a potion of enhanced stamina. Opposite to the south-southwest is a set of shelves holding three minor potions—one of healing, one of stamina, and one of magicka—along with two bottles of Nord mead. On a second set of shelves to the right are a couple more common books, a bottle of skooma, and a potion of resist fire. The corridor continues around the corner to the northeast and passes an open door to an alcove containing a set of shelves that hold twenty-one bottles of Nord mead, a potion of stamina, a potion of minor healing, and a potion of minor magicka. Opposite, attached to the southeast wall, there is a spike wall; the pressure plate that triggers it is in the center of the corridor, just past the alcove door. It is simple to see and avoid.
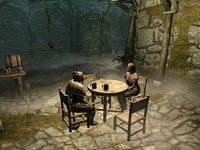
Beyond the pressure plate is a doorway into an L-shaped room with a closed wooden door opposite, and a doorway on the left and a couple of sets of bone chimes hanging from the ceiling in the middle of the room. Around the corner, to the left is the rest of the room with two bandits sitting at a table with four chairs. On the table is a large amount of loose coins with a few more under the table. Above this table is an oil lantern hanging from the ceiling. Behind this table are two sets of shelves holding a random healing potion and a random magicka potion. There is a small wooden table immediately to the left of the closed door holding a mead barrel and a long wooden table against the south wall holding a random enchanted iron dagger, a small coin purse, two bottles of alto wine, a random helmet, and a random stamina potion. Any fighting in the first room will alert two more bandits from the room beyond the door to join in the fight.
Kitchen and Dormitory[edit]
The room through the doorway on the left is small and has a large pile of firewood and a long bow against the southwest wall. Opposite is a chest with an apprentice-leveled tension cable that triggers poison darts to shoot from the left across in front of the chest. To the right is a round wooden table holding three iron arrows and a copy of the Archery skill book The Marksmanship Lesson.
Through the door to the northeast is a semi-circular room that appears to be being used as a dormitory, with a cave-in near the bottom of a flight of stairs on your left. Among the rubble in the corners are a bottle of alto wine and a random potion. Opposite the door, against the inner wall is a set of shelves holding three bulbs of garlic, five loose coins, a drum, and two common books. To the right of this is a sideboard holding two potions of minor healing and a potion of minor magicka, with a pair of iron boots to the right. Against the outer wall is a long wooden table holding a potion of minor healing, with a pair of leather boots underneath. There are two dressers at this end of the room holding a bottle of Nord mead and an iron sword, seven beds and a bedroll along the walls with a hide helmet, another pair of leather boots and another pair of iron boots all next to separate beds. At the far end of the room, beyond a doorway into a circular room on the left are two cupboards holding nothing much of interest.
The circular room appears to be a dining hall with two long wooden tables and benches in the center and several round wooden tables and chairs arrayed around these. There are many portions of dog meat around this room and on the floor by a closed wooden door to the northeast four portions of grilled leeks among several wooden bowls and plates. They are explained in a cook's journal found later. The door leads to a kitchen area with a bandit found working and a fireplace complete with cooking spit in a corner to the northwest. To the left of this is a set of shelves full of clutter. Against the southeast wall is a set of shelves filled with dog meat and seven leeks. To the left of this is a sideboard with a copy of Uncommon Taste on top, and hanging above are three bunches of dried elves ear, two garlic braids, and two bunches of dried frost mirriam.
To the northeast is another doorway into a corridor, with a firewood pile on the left with a woodcutter's axe leaning against it, and a long wooden table on the right with a cook's journal that explains the grilled leeks on the floor, a small coin purse, and six loose coins. To the left is a set of shelves holding only common clothing and footwear. Beyond this the corridor turns to the southeast and there is a bedroll by the wall. In front, this corridor is badly damaged with rubble heaped along both walls. There is a closed wooden door at the end of the corridor with a chain to the right.
Waterlogged Chamber[edit]
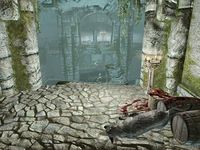
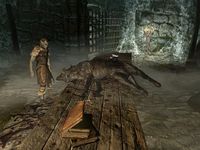
Upon opening the door there is a closed wooden gate behind, which is operated by the chain. There is a balcony beyond the gate with several barrels of foodstuffs on either side, a dead wolf in front, and stairs leading down to a lower level that is partially flooded. Opposite is another balcony with flights of stairs against the walls on either side. On this second balcony are two skeevers. In the eastern corner is an apothecary's satchel on top of a barrel, along the balcony are more barrels of food along with a pullbar on a stone pillar that overlooks the room, and in the southern corner on a crate is a random enchanted weapon. In the middle at the front is a pullbar that also operates the wooden gate opposite, if you have decided to work the other way around the interior. Under the first balcony is an area that can be reached from the lower level at either end, and in the middle of the southeast wall, under the water, is an unlocked chest. The room has many hanging moss plants growing from the ceiling and walls. There is a short corridor to the southeast with a second dead wolf in the water at the start, which ends at a closed wooden door.
This door leads into an area with a central caged area, which has a novice lock and contains two leveled wolves and benches all around, a table and chairs, a sideboard holding mead barrels, and a master-locked caged counter where the bandits seem to accept bets on the outcomes of the fights. Against the north wall are two cages; the first contains a dead Dark Elf and has a novice lock, while the second is empty except for a bucket of dog meat and has a master lock. This implies that some of the fights aren't always just between wolves. The central pit area is splattered with blood and quite a bit has splashed the floor outside the cage. There are bales of straw in the eastern corner, on which is a small coin purse. There are several loose coins on the round table.
Inside the caged counter area is an unlocked chest with a small coin purse on the floor, and under the counter are seven coin purses of different sizes, a random bow, two steel arrows, a quiver of iron arrows, some loose coins, and a leveled healing potion. If you have started the quest Bloodthirst CC, you will also find the Cage Bandit's Note under the counter. On the countertop are more loose coins, an iron dagger, and a bottle of wine. There is a narrow corridor heading west with a few loose coins on the floor, which after a couple turns opens into a room with a bandit standing over a dead wolf on a table in the middle of the room; a second is patrolling between this half of the room and the other half to the left through a central gap. A third bandit is standing in the other part of the room, but will come running along with at least one wolf if alerted by fighting. There are an unlocked cage on your right containing a dead wolf, a tanning rack in the corner to your left, and two long tables in front of you with a dead wolf, three common books, two random empty soul gems, and an iron dagger on top. Behind this is a pressure plate that triggers a spike wall, and if you drop something on it, it enables you to walk behind it into an alcove containing a steel warhammer, an adept-locked chest, and a lever that operates the spike wall. On the north wall is a novice-locked wooden door that opens to reveal a small alcove containing a set of shelves with a potion of minor healing, a potion of minor magicka, two potions of minor stamina, a leveled healing potion, a random potion, a random poison, and a common book.
The second half of this room to the left contains, at the eastern end, an adept-locked cage containing a wolf, and opposite this are three sets of shelves holding an iron helmet, two pairs of iron gauntlets, a hide shield, two pairs of iron boots, a leather helmet, three wolf pelts, and a woodcutter's axe. There is an oil slick along the middle of the floor. In the middle of the southern wall is a master-locked wooden door, with an alcove behind it containing shelves filled with a satchel, a salt pile, two rock warbler eggs, a canis root, and a dragon's tongue flower. Two more apprentice-locked cages—one empty, one with a dead dog inside—are to the right of this door. Opposite these are another two cages both adept-locked and containing wolves. There is a woodcutter's axe resting on a broken pillar in the center of this part of the room, and a partially flooded narrow corridor is found to the west with a couple samples of hanging moss growing from the ceiling. That corridor leads to a curved semi-circular room with the wooden gate you encountered shortly after entering and a sideboard against the wall opposite holding two bottles of wine and several empties. The room continues around to the left with a sideboard and wooden table against the east wall holding a set of iron armor and a Nord mead. Against the west wall are a pair of unlocked cages guarded by a bandit.
To the south are some bales of straw with another woodcutter's axe leaning against them. To the west is a curving flight of stairs leading up, past a stone shelf holding two bottles of Nord mead. On the stairs are two pressure plates that trigger spear traps that come from the outside wall; two bone chimes are also hanging from the ceiling. At the top of the stairs are a badly damaged landing and the second entrance from the other courtyard.
Once outside again, there is additional wooden door in the eastern tower, it is expert-locked, but opens using the key from the large tent. Passing the door there is a barrel containing ingredients, and one containing foodstuffs and a novice-locked chest. There are also stairs curving up to the top of the tower, where a campfire burns in the center with two small tents next to it, these do not have bedrolls inside. The path along the top of the wall leads to the west to another door in the bottom of the tallest tower. More curving stairs follow, with a pit wolf guarding them heading up. The top of the tower has had wooden platforms and stairs added; this is where the bandit boss will be located. They have a unique piece of dialogue (see notes). There are a long wooden table holding a red apple and a dresser on the first level, and more wooden stairs leading to high wooden platforms. On the next level there are a table where the boss is originally sitting and stairs up to the top level, which is roofed over and laid out as a bedroom with a double bed, dresser, cupboard, table and chair, and unlocked boss chest. On the dresser is an enchanted two-handed weapon. The cupboard holds three common books and a copy of the Alteration skill book The Lunar Lorkhan, with a pair of random enchanted boots to the right. On the table is a copy of the Lockpicking skill book Proper Lock Design.
Notes[edit]
- Most of the wolves in the fort are locked in cages, but will attack immediately. However, if you are sneaking and back away upon picking the lock, they will attack the bandits patrolling the interior.
- The bandit chief has a unique line of dialogue: "So you're the one who's been down there killing all my wolves. You're gonna die for that!"
- The highest tower can be tricky to find. Once you are in the exterior middle section of the fort (you can jump straight to this level from a pile of rubble outside the east wall), follow the north wall eastward then southward toward the lake down a short set of wooden stairs. At the base of the stairs, turn north, and you'll see a wooden door. The key for this door is on a long wooden table in a large tent near the top of the fort's exterior. A lit campfire is adjacent to the large tent.
- A silver ore vein is 210 feet north of the fort's tower, on the far side of the rocky area.
- Faldar's Tooth also appears in ESO.
Bugs[edit]
- The key for the radiant prisoner cage is unobtainable, and the cage does not open with the Faldar's Tooth Key. To open the cage, it must be picked.
Maps[edit]
- Skyrim-Places-Military Forts
- Skyrim-Places
- Skyrim-Places-Level 6
- Skyrim-Places-Bandit Camps
- Skyrim-Places-The Rift
- Skyrim-Places-Tanning Racks
- Skyrim-Places-Forges
- Skyrim-Places-Grindstones
- Skyrim-Places-Cooking Pots
- Skyrim-Places-Fishing Supplies
- Skyrim-Places-Clearable
- Skyrim-Places-Discoverable
- Skyrim-Confirmed Bugs
