User:Ingura/Daedric Musings/Photography Tips
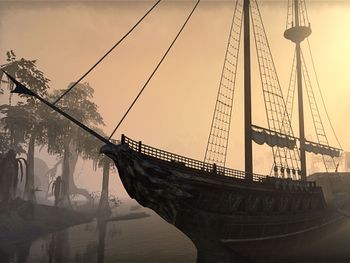
This is Ingura's guide on preparing for, taking, and editing screenshots, with a huge emphasis on the game-world of The Elder Scrolls Online. Most of these tips may be usable outside of this game in particular, but some terminology, descriptions, and tips might not make sense outside of this particular context.
Before You Shoot...[edit]
There a few things that you can do to better your virtual photography, especially in the realm of The Elder Scrolls Online (which is where I primarily take screenshots).
Pick a Proper Shooting Time[edit]
The worst thing that could happen is you choosing to take a screenshot, only for that subject(s) to be near-impossible to take well. This could be Dolmen bosses during peak hours, Cyrodiil NPCs on a packed server, or even something as simple as an NPC (or mob) not being available outside of certain times. To prevent such inconveniences, make sure to choose a time to take screenshots that aligns with both your waking hours and the "waking hours" of your subject(s).
For certain world-time events, don't be afraid to use ESO Clock; it's there for your use.
Use Add-Ons[edit]
It's more of a recommendation than a requirement, but photography-focused Add-Ons can make your job easier. Personally, I use the following three the most:
-
- Ultimate UI Hider, an Add-On that hides all UI elements (allowing me to take Quest NPC images without the arrow over their head);
- Camera Control, an Add-On that allows me to hotkey the directional arrows to my camera (which keeps me from menuing so much); and
- NTak Camera, an Add-On which uses "presets" for certain modes such as mounting and NPC interactions, as well as standard presets.
Some honorable mentions are Advanced UI, an Add-On that gives me a mini-map (in case I'm looking for a particular NPC in a certain location), and all the framework Add-Ons that make these possible. Taking great screenshots is doable without Add-Ons, though: most of my earlier images were done without the aid of Add-Ons. The Add-Ons just make a one-minute screenshot take only one minute, as opposed to five to ten minutes because of camera menuing.
In a similar vein, use hotkeys! ESO has a built-in HUD hider that you can bind to a hotkey, even if it doesn't hide everything. Hotkeys will save a lot of your time down the road.
Use Game Assets[edit]
When I say "game assets", I am referring to the items that you get in game. I'm including in-game mechanics as well for this catch-all term, because I don't want to make a long-winded section title for my own sanity.
Stealth is a very helpful tool when it comes to capturing candid photos of violent mobs. If you need to get up close and personal to take the best images, all you need to do is go into first person mode, whip out your stealth, and invade their sense of privacy. The only caveat with stealth is that some may have effects display on screen, and it can be broken by certain abilities or status effects.
Disguises are an overlooked asset for photography. I'm not just talking Kollopi Essence (but it's great for taking mount photos); some areas have hostile mobs that you really don't want to be dealing with, and also have disguises for those zones. If you have such an outfit, use it! It'll let you get up close and personal with certain mobs without getting their aggro.
There are some Mementos that actually help with photography. The one I use the most is Almalexia's Enchanted Lantern, as it gives me a bright light that revolves around me. It's also one of the few Mementos that don't lock you to an animation! This lets me take screenshots in relatively dark areas— especially those that get no natural light, such as dungeons and buildings.
The caveat with Almalexia's Enchanted Lantern, however, is how bright it is. Some subject(s) get really blown out, such as pale-skinned Humans. This can be adjusted in your screenshot-editing program, but it's hard to remove entirely. The example image to the right is an example of it.
And lastly, Mounts. Mounts have unique hitboxes and adjustable speed that allows you to clamber up terrain that would be otherwise slow and tedious. They can also let you kite mobs that attempt to slow you down. The only issue is that you need to invest (Champion Points or otherwise) in them for them to be good.
Look Foolish![edit]
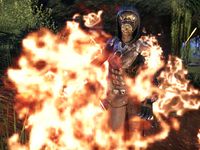
You're taking screenshots— odds are, you're going to be repeating the same actions over and over to try to get the best shot. I've been guilty of this too many times to count: I've hopped in place to take the best pictures of characters lying on the ground; I've kited bosses for several minutes to get their best angles (and laughed when someone came over to kill them); hell, I've wasted Magicka pots upon Magicka pots just so I can take the best candid photos while using invisibility.
In the same vein, if a photoshoot doesn't go as planned, don't worry about it too much. If it's something that is hard to catch, it can be a bummer to not get the perfect shot, but taking photos should be about the journey as well. We take photos as snapshots of the past, so we can reminisce later— perfection is never guaranteed, though strived for. If you are doing the work, but not enjoying yourself in the process, take a break. Don't push yourself to the point of hating something that brings you joy.
Taking a Screenshot[edit]
Proper Lighting[edit]
Lighting will make or break an image— or, alternatively, force you to do more work in your editing software of choice. Note that some of these tips may be similar to that of Staging; unlike staging, however, there are no questions asked: only advice.
Choose a time of day that works for your subject(s)[edit]
The best general advice for photography on this Wiki is to take the photos in the nighttime and edit it in post to the correct lighting values. This is because there are less light and shadow elements at work; it may be effective for many kinds of different subjects, but if your subject is dark, you will have a horrible time adjusting their image if the time of day is also dark.
It should also go without saying that taking a light subject at peak brightness may also cause issues with color balancing. The lighting should ultimately be dependent on the values on the subject(s): dark subjects need bright lighting, and light subjects need low lighting.
By default, the best time to take pictures is during the sunset or sunrise: this is when the in-game lighting is usually warm, and the shadows aren't the harshest. It's also bright enough to get away with a light amount of editing in post, if any, for many kinds of subjects.
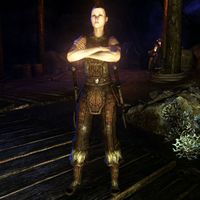
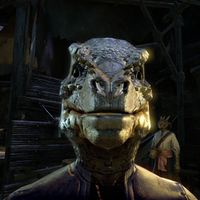
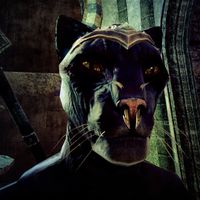
On the left is a subject with a light complexion in a dark area: as a result, they required little amounts of editing. On the right, however, is a subject with a dark complexion in a dark area: as a result, there was a lot of time spent editing their image. Since both images are made to showcase an accessory, and not the character itself, they are both effective at their jobs— one just took considerably more time to make.
Make a room for your showcases[edit]
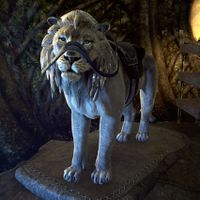
If you're in-game rich (or spend money on the game: I don't judge), odds are you have a lot of items and housing that you don't utilize to its full potential. Some of those items may need some of your wiki contributions, like an image or description. If you like to take pictures of items and outfits, why not make a dedicated area for them?
Personally, I am everywhere poor, so I don't have the most extravagant or organized of setups. I make do with what I got, and sometimes use my main player housing as a shoot location. Having furniture that you can place objects on, or lighting to illuminate dark corners, is integral for a decent showcase area.
Regardless, your showcase area does not need to be fancy: all it needs is decent lighting and a backdrop that contrasts against whatever you're taking a screenshot of. You may be limited by space due to having starter housing and no ESO Plus, which is okay. If you're dedicated to photoshoots, however, a little bit of money-making effort (either online or offline) will get you to where you want to be.
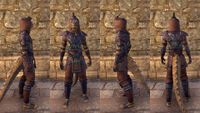
Proudspire Manor  [edit]
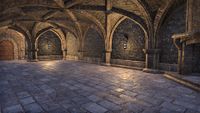
If you own the Greymoor ![]() chapter, there is one particular housing that I use for outfit staging: Proudspire Manor. This is because it is a fairly neutral-colored building, and has the perfect little corner for lighting in the cellar. Since a vast majority of the manor is indoors, you don't have to worry about visiting it at the wrong time of day, as it is consistently lit at all times.
chapter, there is one particular housing that I use for outfit staging: Proudspire Manor. This is because it is a fairly neutral-colored building, and has the perfect little corner for lighting in the cellar. Since a vast majority of the manor is indoors, you don't have to worry about visiting it at the wrong time of day, as it is consistently lit at all times.
Note that you do not need to own the building to take photo-shoots there, unless you're wanting to take pictures of furniture objects. If you do own the building, however, you can set up that little corner better for photoshoots, including the Pillar Technique I mention further down this page.
Staging[edit]
Staging is the environment that you're taking your screenshot in. It goes without saying that your staging shouldn't detract from the subject(s) you are taking a photo of. This can mean something as simple as keeping undesirable meshes or effects from creeping into your shot, or something as complex as values.
Here are the few questions you should be asking as you're choosing a location to shoot at:
-
-
- Is my shooting location in a populous area?
- Does my shooting location provide enough contrast from my subject(s)?
- Would my shooting location wash out my subject(s) in any manner?
- Is it possible to move my shooting location somewhere else?
-
Let's break down these questions, one at a time.
Is my shooting location in a populous area?[edit]
When you ask this question, we are talking about foot-traffic: namely, the foot-traffic of other players. Will a shooting location end up making it hard for you to take a good shot, due to this? If so, plan to take the shot when there are less people around— this is typically during the weekdays, in the late night or early morning.
If you are doing Dungeon or Trial runs for the purpose of photography, make sure you build a party for that explicit purpose, and inform them when to step back or hold off on certain moves. Your tank can kite an enemy for the best shot, all while making it easier for you to focus without the risk of dying.
Does my shooting location provide enough contrast?[edit]
Do not assume that a shooting location is a good spot just because they match the theme of your shooting subject(s). Take into account whether or not your subject(s) will blend in with your environment: some people have a degree of color blindness, which can make what seems to be the best shot into a shot that is hard to discern.
This is why I mention contrast: even if a viewer has a degree of color blindness, proper contrast will allow them to distinguish your subject(s) from its background. If your environment has limited contrast due to a number of factors, they can be alleviated by editing them in your program of choice; it will be relatively moot, however, if your subject(s) literally share the same color and value as your background, though, since the editing program will treat them equally.
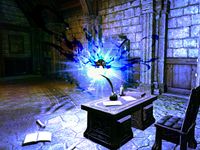
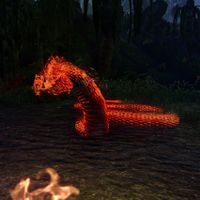
The subject to the right is a vivid, semi-transparent specter, and the screenshot was taken during the night-time. Normally, this would be the perfect time of day to take such a screenshot, but editing it in post was difficult due to the uneven color balancing.
Would my shooting location wash out my subject(s)?[edit]
A similar situation as above, only the emphasis is on saturation instead of contrast. Saturation may double as contrast in certain situations, especially when the subject(s) of your photography are vividly colored.
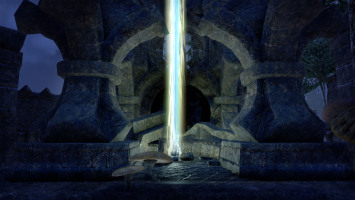
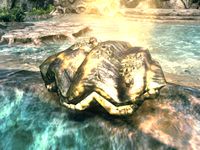
The subject to the left is a bright, glowing entity, which made the detailing on its main body hard to discern. In this case, it may have only been lessened if it were night— to alleviate the over brightness and saturation, steps were taken to darken the image enough so that its details would show, while also retaining its glowing aura.
Is it possible to move my shooting location somewhere else?[edit]
It may sound like a silly question, but if you're taking a picture of a Collection item, odds are there is a better place to take a picture of it than in front of your favorite bank. You want to take the best, unobstructed screenshot of your subject(s), so it is best to show respect to it and pick a location that grants the subject(s) a clear visual. In the same breath, if your subject(s) is something to be worn, try to choose a character that contrasts the color of the item!
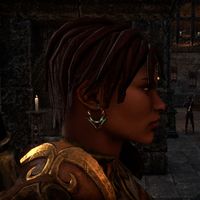
The subject to the right is a minor adornment that is brightly colored; as such, I chose a character with a dark complexion to emphasize it. If I chose a character with a lighter complexion, the image may have needed to be digitally altered so the adornment would stand out on the skin. The lighting here is fairly dark as well, but due to the innate contrast between the character and the adornment, I don't need to process the image.
Angles[edit]
This element of photography may make or break your screenshot: you may have the best staging and lighting, but if your pose looks stiff or incomplete, it can ruin it entirely. Here are some tips and tricks that I utilize consistently enough to force the game to take the screenshots I want.
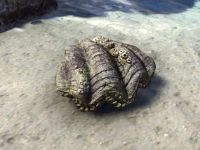
Lean towards high-angle shots as opposed to low-angle shots[edit]
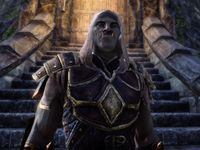
What is a high-angle or low-angle shot, you ask? A high-angle shot is a shot that is taken above a subject's center, and a low-angle shot is taken below a subject's center. For some characters, especially those who are supposed to be powerful, I would much prefer a low-angle shot.
For every other subject, you want a high angle shot: this is because most of the character details are near the top of the mesh, not the bottom. In cinematography, a high-angle shot is supposed to symbolize weakness, vulnerability, et cetera.
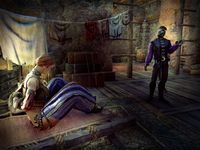
There is an exception: if a screenshot is taken for cinematic purposes, such as a Quest image or a vast environment, low-angle shots can make for nicer images. This is especially true when there is hardly a quest at all, and taking a "normal" screenshot would end up functioning exactly like an NPC screenshot in a different aspect ratio.
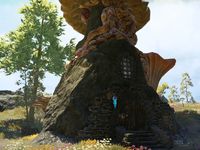
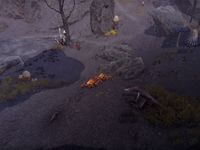
How to take high-angle (and low-angle) shots[edit]
There are two ways to take high-angle shots: one way is to climb up to a mesh above your intended subject; the other way is to jump in place. In the former case, clambering up geometry will grant you a nice vantage point, though it may be easier on some classes than others.
Note that, for the latter option, there is a lot of timing required: your so-called "camera roll" will get filled up a considerable amount when you try to take pictures like this. As mentioned earlier, though, jumping helps you get the closest image possible from a subject (or subjects).
There is only one consistent way to take a low-angle shot, to my knowledge: crouching. If they drop your character's center, some Polymorphs may also help you take low-angle shots. If you are transformed into a smaller character by a quest, it'd be the perfect time to take low-angle shots— that is, if they weren't so temporary. If you're lucky enough, you might be able to take a picture underneath your subject, either by standing in a trench or a decline of sorts: in this case, that may be another accessible way of getting a low-angle shot.
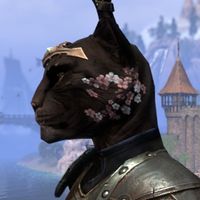
Pillar Technique[edit]
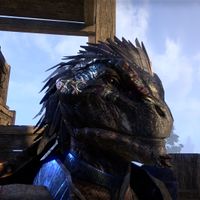
A recommendation I stumbled upon (in MolagBallet's Sandbox 14), you can use the Crown Store UI to take pictures of your characters without needing to fight the FOV slider of your camera. Unfortunately, this method doesn't allow me to zoom in as close as I want to, and as a result, screenshots taken this way are relatively small.
Instead, I use the power of game design to get my desired results.
This is the way I force the camera to take up-close screenshots: I position my character very close to a pillar (or similar object— it needs to be at roughly character height) and use the camera's hitbox to bring the character's face closer to it than the normal FOV sliders can do.
After you get the camera as close as you want, adjust the angle, vertical, and horizontal positioning to your liking, making sure you have the camera collide with your pillar of choice.
Note that you cannot change the vertical or horizontal positioning in this manner, only the closeness. Furthermore, if your "pillar" isn't thick enough, you may have to constantly readjust your character's angle to get the intended zoom in effect. When I find an unlimited zoom Add-On for third person mode, I will stop using this technique— until then, I will die on this hill.
Editing a Screenshot[edit]
For ease of description, I am going to mention a few things from the Improving Screenshots section of the Images help article.
First off, if you're making an image for the wiki, know what aspect ratios are required for an image type: subject-focused images, such as items, NPCs, and creatures, require a 1:1 (square) aspect ratio; nearly every other image needs a rectangular (4:3, 16:9, or 16:10) aspect ratio. Furthermore, know what image formats are required for a certain type of content. When in doubt, every screenshot you upload here should be a .jpg, unless it has transparency elements— in that case, upload it as a .png.
Second off, if you're taking screenshots through Steam, or a third-party app, and the image needs to be edited in any fashion (such as subject-focused images), make sure your programs take pictures in .png formats. This is to preserve the file integrity for when you eventually edit it: .jpg files artifact with every subsequent save, causing what could have been a high-quality image into a subpar one. Steam has an option that allows it to take both high-resolution .png images and low-resolution .jpg images.
I use both: the latter of which are only used as unaltered images, not edited ones.
As a full disclosure, I use Photoshop CS6 for screenshot edits, and Clip Studio Paint as my main art program. The following explanations may (and will) use terminology and hotkeys based on Photoshop CS6: note that many image-editing software have similar tools, but may either name them differently or have different hotkeys for them. Even if it has less baubles and features that the old Adobe program has, Clip Studio Paint can do everything that Photoshop does for me.
Masking (Required)[edit]
Masking is a specialized alpha channel for a layer (or folder) that will usually show white for everything that is opaque, black for everything that is transparent, and grey for everything in between those transparency values. When I edit screenshots, I always use masking: this is because I want my subject to be the brightest, vivid object of an image.
I use a black-to-white gradient for masking, unless I am making a .png cutout. I will say this, however: Photoshop has more gradient shapes than many programs, Clip Studio Paint included, so you may need to modify a gradient if you want similar results. Regardless, a linear and radial gradient is most of what you want.
Here are a few tips: if you want a layer to be a gradual fade from the bottom up, use the linear gradient and bring it up to where you want the gradient to fade. If you want to use a layer to highlight a specific part of the image, use the radial gradient and drag it from the point of interest out.
Remember that a mask is a modified layer that adds transparency to what it's attached to. Some programs will even let you use most layer features on masks, such as transforms and some filters, but be wary: you have to "unlock" the mask from the layer (usually shown as a small checkbox or link in between both boxes), or else you may apply your effects to both the mask and the layer.
Light Values: CTRL+L[edit]
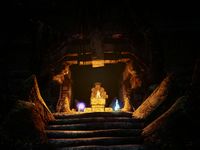
Light values are what the above histogram are showing. When editing screenshots, you want your light values to skew towards the middle, and your bell curve to have a slight peak. In that image, you can see three arrows: these indicate your blackest blacks, your middle-est greys, and your brightest whites.
In short, you want your grey arrow to be near the peak of your histogram. Generally-speaking, you never want to move the black arrow, but in images where a large majority of the histogram leans dark, you want to move the white arrow over until it's a few ticks from the histogram edge.
It is good practice to constantly check your light values as you edit an image, since all of the techniques below are near-guaranteed to change them. Don't be afraid to use this multiple times, either: it is a very useful tool for image clarity. If your program permits it, there is a way to check value and contrast without its use— it is mentioned in the next section below.
Color-Contrast: CTRL+M[edit]
Color-contrast, also known as Curves, will adjust all four values of an image: the general brightness-contrast, as well as the intensity of all three color layers: Red, Green, and Blue. Knowing how to properly utilize this mode to its full potential requires a know-how of color theory and values, but you can "feel for it". I highly recommend making a second window for your screenshot so you can test its values during this stage.
On Photoshop, you can set your CTRL+Y on this specific window and edit it to be greyscale. If your program does not have a Color Proof mode, there is another way of testing values: make a layer above all other layers, color it black or white (any monochrome color), then set that layer to Color. You can swap it on and off to check your values.
Having multiple monitors with different panel types will help you check to see how your image looks on different devices.
Color Balance: CTRL+B[edit]
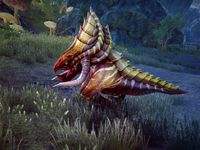
This mode is not as important as the rest, but it became a part of my art process when I did watercolor-style drawings digitally in Photoshop. Basically, Color balance allows you to shift the Darks, Lights, and Midtones of your images along the different CMYK levels. It's, more or less, a more palatable Curves, but without the sort of control that Curves gives you. I use it to add vibrancy to a specific area of the image, and masking away the areas I don't want it applied to.
Expose + Burn (Optional)[edit]
This step is completely optional: some images need a little bit of pop, so what I do is duplicate the original image, bring it to the front, and Expose it. The exposure should eliminate most of the color, and only leave behind a little bit to act as defining shadows. Then, change the layer mode to Color Burn, and shift its opacity around to your tastes.
Photoshop has a dedicated Expose button, but if your program doesn't, all you need to do is up the brightness and lower the contrast of that initial image. It may not give the same results, but for all intents and purposes, it's similar enough.
Exporting Images: CTRL+ALT+S[edit]
This is, arguably, the most important part, especially if you want to export an image into the .jpg format. Sometimes, you want to export an image at a certain size, but don't want it to be full-scale, or want to change the file extension. In many programs, it's as simple as pressing the "Export" button. In others, you can have dedicated shortcuts: for Photoshop, it defaults to CTRL+ALT+S (or CTRL+S if you haven't saved your document to .PSD); for Clip Studio Paint, you can set buttons on your taskbar for exporting in certain file types.
When you use the dedicated Export button (or Save for Web in Photoshop CS6), you can adjust the size of the image there. As menuing in the Export tool can be laborious, I opt to resize the image on my own (CTRL+ALT+I in Photoshop): even if there is no preview option, it's quicker that way.
If you are exporting in .jpg, pay attention to the compression level. In Clip Studio Paint, the Quality can go from 0 to 100, and on Photoshop, it goes from 0 to 12. Personally, my export quality is set to 8 for Photoshop, and 85 for Clip Studio Paint, because it has a hardly-noticeable quality drop while also dropping the file size down considerably. Exporting to .jpg's whole purpose of use is for its low file size! .pngs are good for transparent images, because .jpg does not do alpha channels.
